Review: Megaman Limited Edition HD LED Headphones

The Megaman Limited Edition HD LED Headphone is an officially licensed CAPCOM© merchandise by EMIO

Quick Review Summary:

Pros:

  1. Decent sound quality
  2. Novelty factor
  3. Nice packaging

Cons

  1. Missing accessories
  2. Cheap plastic material
  3. QA/paint issues


Verdict: Although I was able to get this in-store at Php3.5k (around 74USD) vs the online price of 99.99USD, I think the price still does not justify the cheap material, bad quality control, and missing microphone cord.  There are much better headphones within the price range. Normally, this would still be okay for collectors as most would be more concerned with the form rather than the function. It is far from being a collectible though. Stay away.

================

The Megaman Limited edition headset was produced by Emio and is being sold for 99.99USD online. Was very excited to get one when it was first announced several weeks ago and I chanced upon a unit when I passed by a local game store. It was hyped a lot in several major sites:

Before we go to the actual product review, let’s take a step back and get to know more about Megaman.

Megaman (or more popularly known as Rockman in Japan) is a video game franchise by Capcom and is close to the heart of many Gen Y gamers as it was initially released in NES, Famicom and Gameboy systems in the 90s. Its mention reminds me of a very challenging side-scrolling game of a blue robot, dashing and boosting his Mega Buster to battle Robot Masters and save the world. I also used to watch a ton of Captain N: The Gamemaster on morning TV where he was also featured (albeit a different appearance as shown in below pics except in a fanart I got from Devianart).

On to the review!

The packaging is really nice and makes you want to have the item if you see it on a store shelf. Megaman’s face is shown in the front and the headset part of his face is in transparent plastic to show the gadget inside. However, since not a lot of light enters the box it was a bit difficult to see the quality of the item from the outside.

First the accessories. You will receive a small manual, a cord to connect the headphone to the audio jack, a micro USB connector to charge the LED and a numbered Certificate of Authenticity. Sadly I later found out about a missing accessory which I will discuss later in detail.

The headphone is in a protective plastic with a cardboard of the robotic Megaman’s face in the middle.


The Headphone

The gadget has a glossy finish which looks nice from a distance. The access and controls can be found on the base of the left part which consists of an on/off button for the LED lights, a control on how the lights will appear (constant lit, blinking etc), and access ports for the audio jack and micro USB (for charging the device).

Let there be LED light! The light was not as bright as I hoped but it may be because I was doing my review in a well-lit room and the headphone was still running on reserve charge.

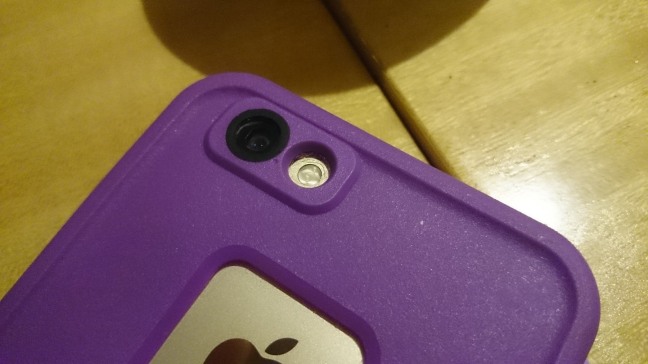
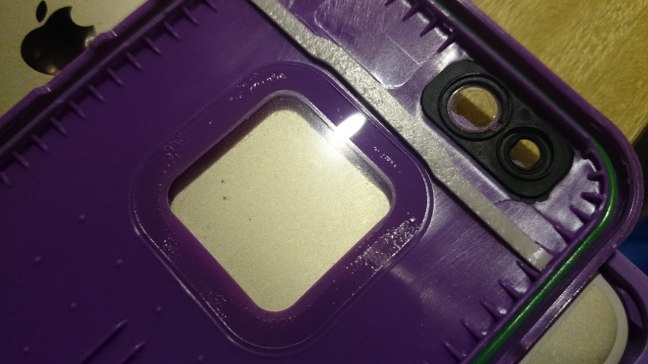
However as I observed more closely I had the impression that the plastic material used was cheap and there were some quality control lapses.

This was how it looked like when I wore it. I was worried that it would not fit because of my big head but as with other headphones, you can extend the size to fit yours.

To be honest, I was expecting the sound quality to be bad especially since I got used to listening to my Steelseries Siberia Elite for more than a year. I was surprised to realize that the audio output of this headphone was actually decent.

Now, for my major gripe. I checked on the manual and found these:

This headphone should have come with a remote and mic (three-conductor stereo mini plug for iPod and iPhone with remote and microphone function), but it didn’t. I felt robbed, and went to the store to ask about it. The attendant asked their home office about it and apparently, IT IS THE SAME FOR ALL INVENTORY. At first, I thought that it was just misplaced, but the accessory was not included with the gadget at all! It was also the first time that the store learned about the issue and was as surprised as me. I guess their distributors will hear something from them.

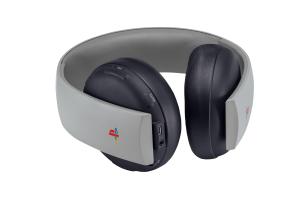
It should be obvious at this point that I was not happy about this purchase, and the store attendant offered a refund. I know that it is not their fault and I decided to just buy another item instead (20th Anniversary Playstation Gold Wireless Headset, something I’ve been eyeing for quite some time now).

PS4-20th-anniversary-gold-headset
Not Megaman. But I am a happier man.
Would you happen to own the Megaman Limited Edition Headphone yourself? How was your experience? Did you receive the missing mic/remote in your package? Where did you buy it? Comment below and let’s discuss further.


Case Fail: A Lifeproof Experience

I know how expensive phones are, so I have done away with getting cases for mine that are purely for show, despite how pretty I find them. Fortunately, cell phone case makers have been innovating their products, adding nifty features like built-in flash drives and styluses, and boasting features like “SHOCKPROOF! SCRATCHPROOF! WATERPROOF!” These are the cases I’m more drawn to considering my innate clumsiness and the fact that I have a toddler who likes to grab mommy’s phone.

To my knowledge, there are two brands that are available in the local market that offer “Phone Protection”: Otterbox and Lifeproof. I have had a dependency on them since my first iPhone, having gone through one Lifeproof, and Otterbox’s Defender and Commuter. My recent, Otterbox’s Armor, was specially built like a tank (as one of my professors jokingly called it) and, though it was heavy and bulky, it did what it was meant to doprotect my phoneso I was satisfied.

Naturally, when I upgraded phones this year, I gravitated towards these two brands when looking for a case. But Otterbox had stopped making waterproof cases after purchasing Lifeproof, so I was left with only the latter for choice. I had a good history with Lifeproof for the iPhone 4, so I didn’t hesitate getting one for my new phone.

Of torn plastic like hymens

While out of town within a week of using my new Lifeproof case, I noticed that the plastic over the light for the camera flash had been torn. This was surprising to me since I didn’t thiink any of the case’s parts would be so flimsy. I recall that the older Lifeproof I had had a much harder plastic sheet covering the phone camera and flash.

11953593_10153080050003342_4783641131409971023_o

I remembered that the shop I had bought it from gave me a warranty certificate, so upon returning to the city, I went back to them to ask about it. They referred me to the iFix Center in Pasig, which handles service issues; it wasn’t an easy place to get to. Unfortunately, when I presented my concern to the people at iFix, they told me it wasn’t covered by the warranty because it wasn’t a “factory defect” but “user’s fault.”

WHAT.

Excuse me? I did not buy a waterproof case for close to 4,000 PHP (approx. 85 USD) just to compromise one of the reasons I bought it in the first place: its being waterproof.

In my defense, it had only been in use for a week before the plastic got torn and it was never dropped, thrown, or submerged in water within that period. I suspect the culprit must have been one of the contents of my bag, in which case, it is quite laughable that a product that’s being marketed as dropproof, dustproof, scratchproof and waterproof cannot withstand the contents of a woman’s bag. Suffice to say I was extremely disappointed.

Here are some other flaws of the Lifeproof case:

11894603_10153080048763342_7702046033430695330_o
A view of the torn plastic of the phone flash from the inside. I would also like to comment on the plastic backing that wasn’t present in the old Lifeproof cases. I assume this addition is meant to show off the iPhone logo, but on a waterproof case, it seems unnecessary. It also appears to have been attached using only glue. I wet the back of this case a few days ago (taking care in avoiding the camera area) and noticed that water had begun leaking through the plastic square.
905633_10153080049348342_348158862789116919_o
The plastic part for the mute/ringer button was easily chipped. This happened about a couple of months after the flash plastic was torn. By then, I was already resigned to not having a waterproof case so this didn’t bother me as much.

If you’re in the market for a waterproof case, I’m afraid I must highly discourage you from getting a Lifeproof. Sadly, as far as I know, it’s the only brand available locally that offers water protection. So if you have the means or contacts abroad, please consider some of the other options listed here.

Build Your Own Online Store: The TackThis! Grand Launch

This bit of news may not be so geeky, but it’s definitely in tech! And it impacts those of us who have gotten used to letting our fingers do the shopping.

On August 13, PLDT SME Nation and Voyager Innovations launched their new eCommerce brand TackThis! at the Marriott Grand Ballroom. TackThis! is a platform aimed at businesses that want to put up their own online store. Locally, many are understandably intimidated by this still novel process of eCommerce. Even with the kind of technology that’s available, one still needs help from a reliable web developer in putting up a site with all the trimmings. TackThis!’s Concierge simplifies this process. They offer to do all the work—from product photography and styling (yes, even the hiring of models and photographers), to web design to store setup to handling of delivery logistics; all you have to do is supply the goods. They will even field customer service calls. And when it’s all done, you can connect the store with your social media accounts, essentially “tacking” it to your Facebook page, blog, or existing website.

Honestly, it sounds like a lot of work for the TackThis! team, but a load off the backs of entrepreneurs. Speaking as a consumer whose first instinct since the advent of the internet is to run a Google search on a product’s availability, I think that brands would be served well by having their footprints felt on the World Wide Web. And when you consider the proliferation of fake products being sold online, it’s reassuring to know that the goods we’re buying are authentic because we’re getting them from the official distributors.

For now, here are some photos from the event.

IMG_9762
Event Host Paolo Abrera.
IMG_9765
First VP and Head of PLDT SME Nation, Katrina Luna-Abelarde, gave the intro speech.
IMG_9767
Voyager Innovations’ VP, Mitch Padua, explained the slow growth of Philippine eCommerce and TackThis!’s future role.
IMG_9775
During the launch, the TackThis! team was challenged by Silverworks to create its online store within 60 minutes. The TackThis! Concierge managed it in less than an hour. In photo are Voyager Innovations’ Rebecca Ricalde and Silverworks’ Chief Executive showing off the finished product with event hosts Issa Litton and Paolo Abrera.

The Canon EOS-M3, it may not look like much, but it got it where it counts.

I had the original Canon EOS-M and it was a pretty OK camera despite the very slow autofocus function. The concept was sound; it was a mirrorless camera with the same APS-C sized sensor (1.6x crop of a full-frame 35mm camera) found in Canon’s 650D DSLR and could hold any lens that Canon has ever released, thanks to its EF/EF-S to EF-M Adapter.

Most people may not like the EOS-M, but I appreciated it for one thing: it’s a great travel camera. I lugged around a Canon 6D along with a few lenses in most of my trips and it was very tiring.

Canon released the EOS M3 and it now has the same sensor as the newer 750D and 760D DSLR and also a better AF system, which is about 6x faster than the original EOS-M. In the Philippines, they’re selling it at these SRPs:

Kit Lens Options:
18-55 Kit = 25,998.00 PHP (561.47 USD)
18-55/22 Kit = 33,498.00 PHP (723.44 USD)
18-55 / 55-200 Kit = 40,498.00 PHP (874.62 USD)

If you want to see the complete features and specifications of the new EOS-M3, click here. The more noteworthy ones are:

  • 24.2 Megapixel APS-C Sensor
  • DIGIC 6 Digital Image Processor
  • Can shoot 4.2 frames per second continuously
  • Has a 3-inch touch screen display
  • Has NFC and WiFi for syncing with any Smartphone.
Yodobashi Prices in Japan for comparison


I had mine picked up in Japan and got the 15-55 / 55-200 Kit for 107,770 JPY which roughly converts to 40,019.69 PHP (864.29 USD). I’m glad Philippine prices are now matched with international SRPs and at least you get the full warranty coverage. But the advantage in buying it from Japan is getting this practically free of charge: the EVF-DC1.

The EVF-DC1 electronic viewfinder costs about 11,500 PHP (250 USD) so I’m glad I didn’t have to pay extra for this little accessory. Without this thing, it is hard to see what you’re taking pictures of in broad daylight.

Here are a few sample pics I took with the EOS-M3:

This slideshow requires JavaScript.

_DSC0394There were a lot of times that I wished I had brought both an ultra wide lens for landscapes and a telephoto one for something far off. But I always ended up leaving one because of the weight. The current EF-M line lenses pretty much cover all the base focal lengths and although they may not be as good as their big brothers, they do get the job done. I won’t have second thoughts in packing them all for a trip. You can see how small these lenses are compared to their DSLR counterparts.

_DSC0396Even if you’ve invested in EF or EF-S lenses and don’t want to spend more for specialized ones for the M3, Canon’s official EF to EF-M adapter is a must have. I bought this for around 5,000 PHP (108 USD). Compared to the usual third-party solutions at this price point, you retain full autofocus functionality with any lens you plug this thing into.

Now this camera is definitely not for everybody. Most professionals would rather get a second DSLR while casual photographers will probably use a normal point-and-shoot. What the EOS-M3 does for me is fill the gap between my general purpose iPhone camera and my 6D. It’s small and light enough to bring as a secondary body when I want to shoot with an ultra wide or a telephoto lens without having to worry about losing my ability to shoot with a full-frame camera.

Nvidia Shield

The Nvidia Shield—not to be confused with its older brothers, the Shield Portable and the Shield Tablet—is the latest product by Nvidia and now specifically built for the Android TV platform. I’m still wondering why Nvidia didn’t just call it Shield TV to avoid confusion.

Anyway, I’m stoked for a Shield (TV) because of exactly what the Shield Tablet does so well, and that is GameStream.

Looking back at the Shield Tablet


I’ve been a fan of the Shield Tablet because, at 299USD (got mine from Game One Gadget and fairly close to US prices), you get a superb 8-inch 1080p tablet running near stock Android, a stylus with simulated pressure sensitivity, front-facing speakers, and an HDMI out.

IMG_1103

Yes, it has a built-in mini HDMI out that connects to any display with the corresponding HDMI input, whether TVs or Monitors. You don’t have to get yourself a compatible MHL cable and lose access to the micro USB port, especially when you need to charge.

And this is where GameStream and console mode shine. I’m one of those guys who love PC Games but still want the comforts of playing on a couch with a controller in front of a big-screen TV. Nvidia bridged that gap with the Shield Tablet.

There are, however, some limitations to this setup as you’ll need a PC with an Nvdia-based GPU (you can see the minimum requirements here), as well as a really good wireless-N router. You’ll get best performance with streaming if the router and the Shield Tablet are within each other’s line of sight.

Shield (TV)

Shield-Controller

With all the features of the Shield Tablet, I’m super excited for the Shield. Now, core specs are one thing but this is what really got me excited:

side-view-specs
Look at all those available ports!

Those are 2 full-size USB 3 ports, along with an Ethernet port for wired networking. There are quite a few possibilities with this setup since now I won’t have to depend on a USB OTG cable anymore and lose my ability to charge the Shield Tablet.

With the Shield (TV), you not only have a dedicated charger, you can plug in a USB Flash Drive or HDD and play media from it, plug in a PS4 Controller if you want to (it worked on the Tablet) or any other USB devices like a keyboard, a mouse, a webcam, headphones, etc. It can basically act as a small-form computer if you wanted it to since Microsoft Office is available in the Google Play Store.

Using Ethernet should also give you a better GameStream performance (1080p at 60fps). No more hiccups because of bad reception of wireless signals. You should also have a better experience streaming video content from a DLNA server or the better alternative, Plex.

You can even do Netflix, provided you setup a VPN account. Private Internet Access is a good option and even has their own dialer app, which is super easy to use.

I’m still waiting for this to be locally available. I’ll probably even get this from the US and just ask a friend to bring it over when he comes home. You can get more information about the Nvidia Shield here and try to read up on the FAQ for more detailed information. You may think you don’t need it, but maybe you’ll want it just as much as I do.

It is time to set up a Lunar Base at the far side of the Moon

The new head of the European Space Agency (ESA), Johann-Dietrich Woerner, proposed in an interview that we should establish a Moon village on the far side of the Moon. He stressed that it is a stepping stone to further human exploration of the Solar System. By doing so, the plan is to achieve the following, among others:

  1. Placing a powerful telescope at the far side of the Moon would probe a deeper study of the universe while blocking out the radio-wavelength noise of Earth civilizations.

     series of space telescopes on the Moon’s far side would give us an unprecedented view of the Cosmos. Radio telescopes would be free of Earth chatter. Credits/photo from  21stcentech.com
    A series of space telescopes on the Moon’s far side would give us an unprecedented view of the Cosmos. Radio telescopes would be free of Earth chatter. Credits/photo from 21stcentech.com
  2. Allowing extensive research on how to better cope against the moon dust that is harmful to astronauts’ equipment. This should also prove useful moving forward, e.g. Mars has tons of this powdery material as well.
  3. Furthering studies to protect inhabitants from radiation shielding and low gravity, that would mean the capacity to stay longer in space.

Comments from a related article suggest various ideas on how to go about it. Future manned missions to the moon is limited by exposure to space radiation, most especially if it will take a longer period of stay. There were studies concluding that Lunar Regolith, particles of dust, tiny rocks and soil found in the moon, can be used as a suitable radiation shield. This should allow a readily, abundant supply of material that we could use to build  a working Moon station.

Footprint impressions in the lunar regolith. Credit: Nasa/Science Photo Library

To do so, however, Woerner emphasized the need for a massive global collaboration. He also encourages NASA to test the technology for giant 3D printers on the Moon first before proceeding with their plan to set up a base on Mars. It would also make better practical sense since a lunar community would only be four days away while one on Mars would take six months to get to.

A Colossal Leap

“That’s one small step for (a) man, one giant leap for mankind,” as goes the famous quote from Apollo astronaut Neil Armstrong as he planted the first human foot on another world. This American expedition 40 years ago can be considered one of the greatest highlights in human history. What more can we achieve now in the digital age where collaboration around the world is easier, and the flow of information is more accessible to everyone? The advancement of technology, particularly in robotics and communication, combined with the strength of each nation could usher in a brighter future—and indeed a bigger leap for mankind.

I agree with the head of ESA in concentrating all efforts in the far side of the Moon first rather than putting more effort into Mars at this point in time. Mankind will have a better batting average in space exploration and we can use what we learn on more complicated projects moving forward. There are related talks about this, like the  Global Lunar Conference in Beijing aiming to put a Lunar Base up by 2050. Meanwhile, Russian scientists are planning for a 12-year-long Moon exploration program (2025-2036), which will be composed of an initial phase of an orbital station on a near-moon orbit before construction of a permanent base at the lunar surface.

space colony, gundam the origin
Space colony from Gundam The Origin

Soon, space colonization

The news article reminded me of the usual scenarios in Gundam storylines where the humans live in space due to an excess in population. People who live outside Earth for too long become Newtypes, developing some sort of psychic talent that allows them to be more aware of their surroundings. I always wonder if stories like this could be a possible reality in our lifetime but space colonization, I believe, is mankind’s natural progression.

Photo credits on the top of page/featured photo: Moon Base, painting  by Phil Smith.

Eye in the Sky: Review of the DJI Phantom 3 Advanced

DJI’s Phantom 3 is the latest iteration of their Ready-to-Fly (RTF) consumer-grade quadcopters or drones, as they’re more commonly called. For the longest time I’ve always wanted to buy a remote controlled (RC) aircraft to the point that I even bought 3 small helicopters from local toy stores. When Henry’s Professional, a local camera and photo supply store, started bringing in DJI products as an authorized dealer, the Phantom suddenly became within reach of Philippine customers. Retailing at 48,999 PHP, or around 1,083 USD (1 USD = 45.22 PHP as of 16 July 2015), local prices are pretty close to the U.S. retail price of 999 USD plus sales tax (ranges from 5% to 9.45% depending on the the state).  For cash-strapped customers, Henry’s Professional also offers the Phantom 3 at a 6-month, 0% interest deferred payment term using major local credit cards.  Since it is a bit pricey, my friend and I decided to buy the Advanced version and split the cost between us.

IMG_2482

Professional vs. Advanced

Before deciding on the Phantom, I admit I was hesitant because of another drone, the Solo by 3DR, which hit the U.S. retail shelves sometime last June. The Solo has advanced autopilot features, preset flight modes and full integration with a GoPro camera.  But beyond the product videos, I can’t tell you anymore as it is not yet available in the Philippines.  Being a sucker for instant gratification, we went for the DJI Phantom 3 Advanced.

Why the Advanced and not the Professional?  We took into consideration what we wanted to use it for.  My friend and now co-owner of the Phantom 3 Well is a professional photographer, and he plans to use it to take aerial still images.  As much as I would have liked to buy the more expensive Professional version, it didn’t really make that much sense for us to pay 60,999 PHP when both models use the same sensor (Sony EXMOR 1/2.3” with 12.4 megapixels) capable of taking photos in RAW (.arw) format. The only real difference between the two models are video resolution and charging time. Here’s a comparative table showing the differences in their specs:

Phantom 3 Professional Phantom 3 Advanced
Stills 12.4MP 12.4MP
Video 4K 1080p
  • UHD: 4096x2160p 24/25, 3840x2160p 24/25/30
  • FHD: 1920x1080p 24/25/30/48/50/60
  • HD: 1280x720p 24/25/30/48/50/60
  • FHD: 1920x1080p 24/25/30/48/50/60
  • HD: 1280x720p 24/25/30/48/50/60
Charger 100W (60mins from 0 to full) 57W (96mins from 0 to full)

For more detailed hardware specifications, please visit DJI’s site.

IMG_2480
First Flight

Due to vague regulations on drone usage in the Philippines, we had to be cautious on selecting the place for our first test flight.  We settled on an empty field devoid of people and structures somewhere in Alabang and nervously made our initial lift off.  Before the test flight, I did my homework by watching a lot of tutorial videos and reading various articles on pre-flight preparations and flight controls.  While it is always best to be prepared, the test flight was a breeze using the automatic Take Off command on the DJI Pilot App (available in Android and iOS).  The drone pretty much flies itself, and is smart enough to know how to maintain its altitude and position without me having to do it via the remote control.  Once the drone is up in the air, it was a matter of getting used to the controls to move it to where you want it to.  Left stick controls altitude and rotational direction while the right stick controls lateral movement (front, back, right, left).

The controller has a sleek and simple design, with a clamp to mount smartphones or tablets that will serve as your display unit or monitor. Advanced features and settings can be accessed within the Pilot App.

Here are a few sample shots we did during our first test flight:

IMG_2580
A trip to the Beach

When I was packing up for my Boracay vacation, I decided to bring the Phantom 3 with me.  I thought that this would be the best place to practice flying and take some aerial shots of the island. I bought a spare battery thinking that 20 minutes of flight time won’t be enough for practice. It was a good thing that I did because I discovered that you can’t charge the battery immediately after use. The battery needs to cool down to room temperature, which may take about 20-30 minutes, before the charger will actually charge it.

IMG_2489

I was nervous flying the Phantom 3 beachside because of strong winds, thinking that I might lose control of it which would then lead to it crashing into the sea. After flying for the first 10 minutes, those fears were allayed as the Phantom 3 was able to maintain its altitude and position thanks to its GPS system.

The drone needs a GPS lock first before taking off. The GPS helps when flying at high altitude where winds are stronger, as it prevents the drone from drifting off by maintaining the relative coordinates it receives from GPS satellites. The Phantom 3 also has the Vision Positioning System (VPS) initially introduced in DJI’s high end drone platform, the Inspire 1. The VPS consists of ultrasonic sensors with a down facing camera that searches for patterns on the ground to determine its position and make sure it stays where it is supposed to be.

Here are a few shots of Boracay from Station 1:

Shutterbugs and professional photographers alike will appreciate the ability to manually set the shutter speed, ISO, etc. on the Pilot App. Or you can just set it on automatic like a regular point-and-shoot camera. Here are some night shots taken with the long exposure setting:

Final thoughts

I am a frustrated pilot. Since I can’t really fly an actual aircraft, I played A LOT of flight simulators to overcome my frustrations.  Having a Phantom 3 is the closest thing I can get to flying.  But the Phantom 3 IS NOT A TOY! Yes, we get all excited and act like children from time to time when flying this thing but the Phantom 3 is certainly not a product for children. Prior to even considering the purchase of the Phantom 3, I practiced with toy helicopters, studied rotary wing flight dynamics and watched a lot of video tutorials on various quadcopters.

There’s also an issue of interference. It is always recommended to fly in a wide open space without obstructions. Since the drone operates on a 2.4 GHz band, wireless phones and Wi-Fi routers may interfere with controls if you fly it at home. During my test flights at the beach, there were cellphone towers nearby. At one point I lost my video feed above 300 ft. but I was still in control of the drone and just to be safe, I lowered the altitude until the video feed was back on.

I cannot emphasize enough the importance of carefully selecting and planning where you intend to fly the drone.  General rules are: (1) Stay clear of populous areas; (2) Avoid airports; (3) Keep within the 400 ft. above ground level (AGL).  [See CAAP Memorandum Circular No. 21-14, series of 2014]

Is it a must have? If you dream of flying AND you actually have a professional use for it, a definite YES!  But if your aim is to play around and fly irresponsibly without any consideration for public safety, please don’t ruin it for all drone users and do us a favor by getting yourself an RC toy helicopter from Toys R Us.

[All photos taken with the Phantom 3 in this article are jpeg files taken straight from the camera with no post-processing.]